Setup Screen
The Setup InSight Alerts screen has two panels: the currently defined InSight Alerts are listed on the left panel, and the details of the selected InSight Alert are displayed in tabbed pages on the right panel:
The panel on the left lets you select the existing InSight Alert to work with, and create new alerts:
| • | To edit an existing alert, select it then use the tabs in the right panel to reconfigure the alert. |
| • | To delete an existing alert, select it then click Delete. |
| • | To create a new alert, click Create then select the type of InSight Alert you want to create. A new alert is added to the list. Select the alert and use the tabs on the right panel to configure the alert. |
|
In addition to using the Setup InSight Alerts screen, if your account includes support for Install Types, you can use the Diagnostic InSight Alerts tab of the Install Types screen to create InSight Alerts based on inputs. |
The panel on the right lets you configure the currently selected alert. It has several tabbed pages:
| • | Parameters lets you specify the rule that causes the alert to trigger and configure how the alert triggers. |
| • | Email options lets you specify which emails should be sent when the condition for the alert is met, and whether they should be sent when the alert triggers or when the alert ends. |
| • | Push notification options lets you specify whether or not to send mobile device notifications when the condition for the alert is met and what the notification message should be. |
| • | Pop-up options lets you configure the InSight Alert so that a pop-up opens whenever the alert is triggered. |
| • | Roles lets you share an alert with other users who have any of the roles you specify. |
| • | Schedule lets you specify when the alert is in effect. When an alert is not in effect, the system does not check for the condition that defines the alert. |
Ensure you click Save after making any changes.
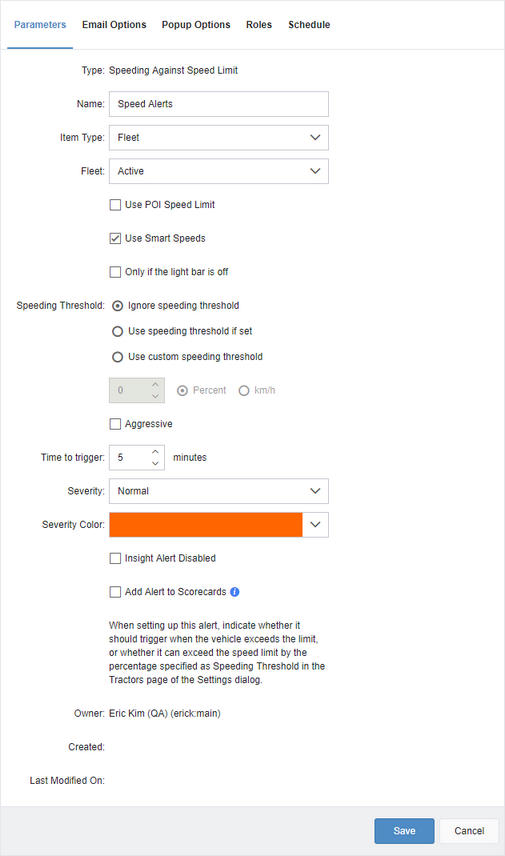
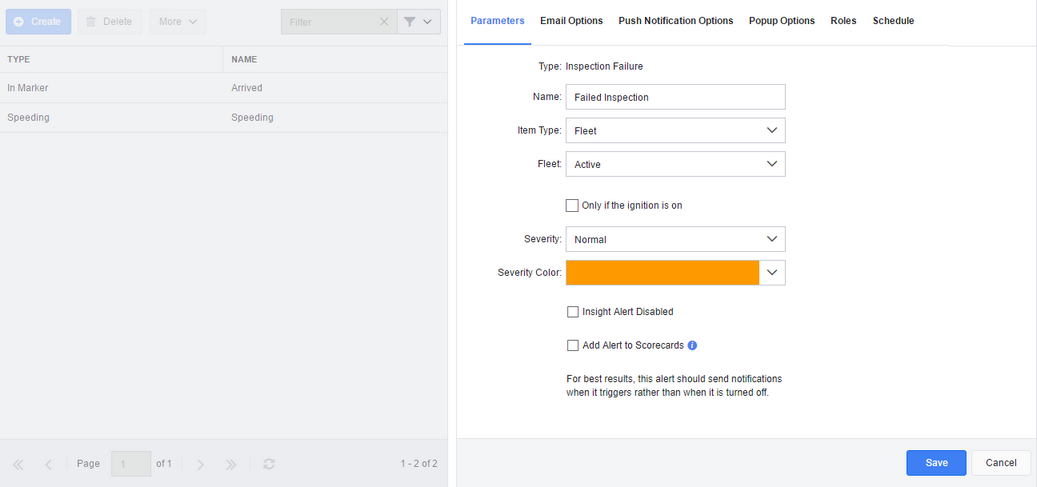
The Parameters tab lets you define when and how an alert triggers. Below is an example of the Parameters tab for the InSight Alert "Speeding Against Speed Limit":
The Parameters tab lets you specify a subset of the following values, depending on the type of alert:
|
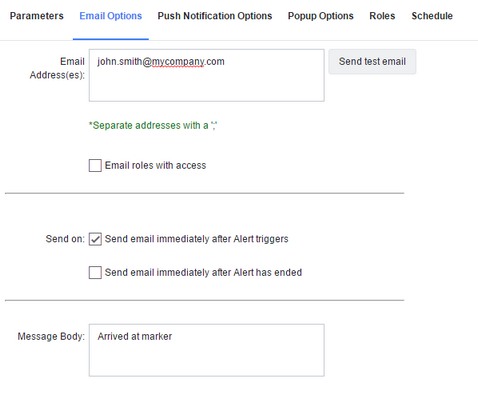
The Email Options tab lets you specify which emails should be sent when the condition for the alert is met. You can also specify whether the emails should be sent when the alert triggers or when the alert ends.
You can specify the following values:
|
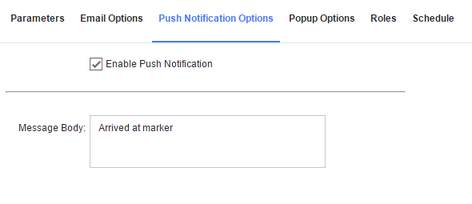
The Push Notification Options tab lets you configure the alert so that a notification is displayed in the notification tray on your mobile device. The notification is sent to the currently signed in user, as well as to all subuser accounts with roles added to this alert on the Roles tab.
The Push Notification Options tab contains the following options:
|
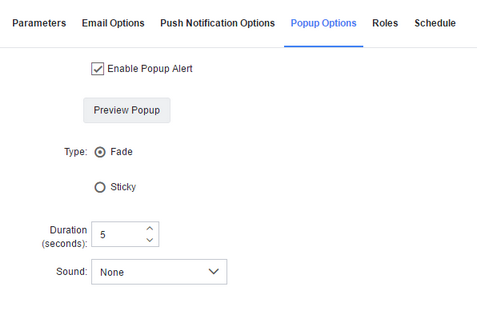
The Popup Options tab lets you configure the alert so that a pop-up is displayed on screen when the alert triggers. This pop-up is displayed on the screen you are viewing, so that you do not need to check the InSight Alerts Inbox to see that the alert has triggered.
The Popup Options tab contains the following options:
|
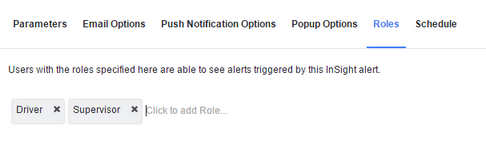
The Roles tab lets you share an alert with other users.
To share the alert, click in the Roles space and enter part of the name of a defined role. When you add a role, the user is notified when the alert occurs in the following ways:
|
The Schedule tab lets you specify when an alert is in effect. When an alert is not in effect, the system does not check for the condition that defines the alert. This can be useful, for example, if you want to be notified when a vehicle arrives at its destination after hours: you can set up a marker alert to trigger only during off-hours.
Use the From and To controls to specify when the alert first starts taking effect on each day of the week and when the alert stops taking effect for that day of the week. To lock your schedule, or to enable editing of a locked schedule, click the padlock icon. To invert the active time period for any day, select the Inverted check box. Select the Prevent activated InSight Alerts from being turned off outside the scheduled active time check box to specify that triggered alerts can only be deactivated during the times you have scheduled as being active. By default this check box is not selected, and any new alerts can deactivate outside the scheduled active time, allowing for greater alert accuracy. |
 Previous
 Next
Next Expand/Collapse
 Print
Print Share Page
 Training
 Knowledge