Requirements are based on text "tags" assigned to vehicles and drivers. Typically, these tags represent special skills or properties that are needed for jobs, such as special driver training, or specific vehicle capabilities. For example, using job requirements, you could ensure that the vehicle sent to service an elevated telephone line has a boom arm, and that the driver of the vehicle is qualified to operate the arm; or that jobs requiring a tow truck are not assigned to a pick up.
To work with tags, first define them using the Tags screen in the platform interface. The steps below assume you have already created tags that have been applied to both your vehicles and drivers. See the platform help system for information about creating, editing, and assigning tags to drivers and vehicles.
To specify special driver or vehicle requirements for a job:
1.
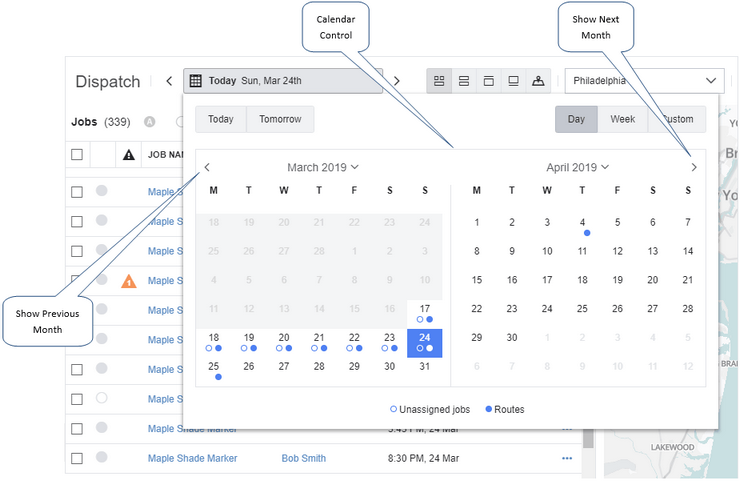
Use the date control in the upper left corner of the Jobs List panel to select the date of a job. You can also change day using the left and right arrows to move ahead or back one day at a time:
•
If the list of jobs is long, use the search control or the status filter to show only jobs of a particular type. Click the control beside Jobs:, and then choose a status from the menu.
2.
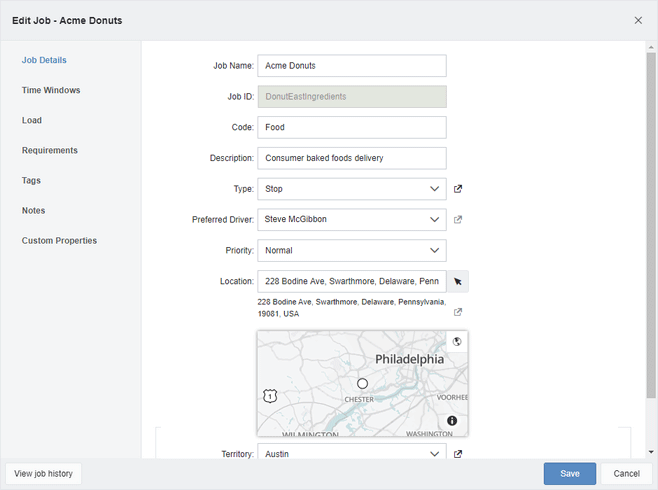
Click the highlighted name of the job you want to add special requirements to in the list, or right-click and select Edit from the contextual menu. The Edit Job dialog box opens:
3.
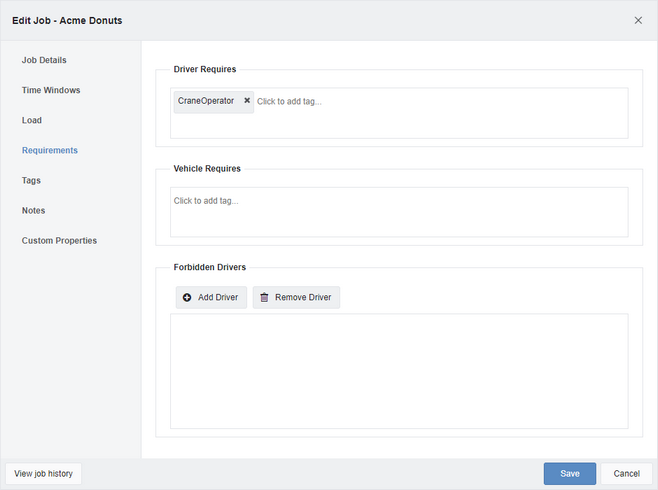
Click the Requirements tab:
4.
Click within the box in the upper Driver Requires area and type part of the tag name that the driver completing this job must have. As you type, a drop-down list appears with all of the tags that the string you enter matches. When you see the tag you want to assign, select it from the list by clicking it. In the example below, the tag name is "CraneOperator". Once selected, the tag appears in the white space as a text bubble. To delete it, click the "X" to the right of the tag name.
5.
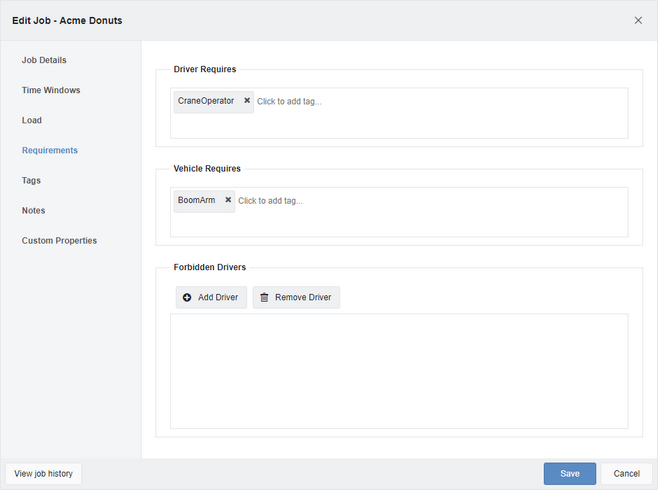
Click within the box in the central Vehicle Requires area and type part of the tag name that the vehicle completing this job must have. As you type, a drop-down list appears with all of the tags that the string you enter matches. When you see the tag you want to assign, select it from the list by clicking it. In the example below, the tag name is "BoomArm".
6.
Click the Save button. The job requirements are saved. View the job requirements whenever the job is opened and the Requirements tab is selected. When manually assigning a job to a route, any jobs that require a driver or vehicle tag that is not met causes a warning message to be shown.


 Previous
 Next
Next Expand/Collapse
 Print
Print Share Page
 Training
 Knowledge